Showing posts with label Japanese. Show all posts

Saturday, November 10, 2018

News about my booklet and "Ripples"

http://www.blurb.com/b/8076897-japanese-basketry-embellishments
Here's a link for purchasing my booklet on Japanese basketry embellishments through Blurb.com

My booklet shows how to put Japanese basketry embellishment knots and wraps on baskets. They are the same knots you see on my rocks. There is also a section on putting a knot on a rock. The booklet is 24 pages long, w/ color photos. With practice, you can put any of these embellishments on your favorite rocks.

If you read my previous post, you'll know that I've been really ill.  But thanks to my doctors, I am slowly recovering.  That's the good news.  The bad news is that I might have to have immunotherapy infusions for the rest of my life. However, you didn't stop here to read about my health.

My newest woven piece has been very fun to work on.  I was able to weave with new materials (to me) and weaving combinations.  The first  item was ramie cord, or Chinese nettle, that I purchased at the Japanese Garden gift shop in Portland. Same family as European stinging nettle, different species.

Have you heard of hinoki?  It is Japanese cypress, or Chamaecyparis obtusa, which is a sacred tree.
Every year, Japanese woodworkers have planing competitions, in which they try to produce  the thinnest piece of wood.  Some are many times thinner than human hair!  https://www.youtube.com/watch?v=2vINeD7nQ2

 My fiber friend, Mari, was kind enough to give me some samples when I visited her studio.  I decided to spin it for weaving. These were pretty thin pieces.  Thinner than a piece of copy paper. 


I used both of these fibers, and more in making my newest 'hybrid basket.'  The center is pine needles woven around a resin base, followed 
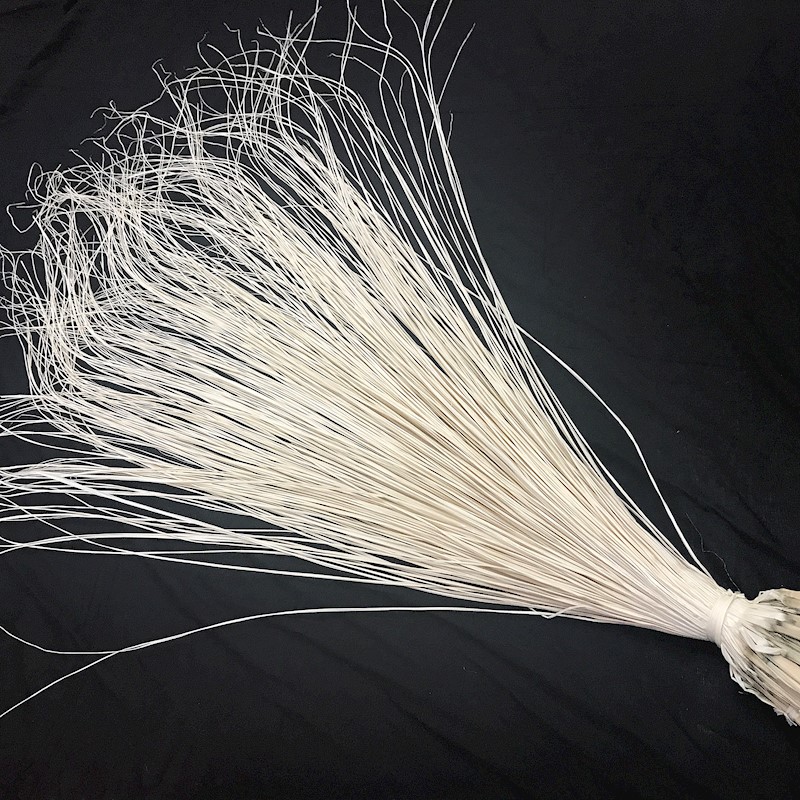
by ni'au blanc leaves.  They are bleached white coconut leaves that you might have seen on Tahitian headdresses.


Then I attached some leaves to the last row of coiling, and started twining.  I used waxed linen, waxed cotton, more ramie cord, hemp cord, and horsehair.  The last few rows are Perigord weave.  (I learned this technique with Eva Seidenfaden's book, The Art of Basketmaking - The Périgord Technique and Tradition.

If you're not familiar with this weave, it's used in willow basketry.  Here's a sample from the book. 
perigord Technique weaving-ის სურათის შედეგი

At first, I was going to make my piece into a wall hanging.  But then, I decided that I like it better as a decorative basket.  


 That's how the Perigord weave looks, on the last two rows.  Don't look too closely at my coiling!  I still consider myself a beginner.  And, somehow, when you're up at 3 am, functioning on 5 hours of sleep, the stitches get turned around, but you don't see it, until it's too late.😒

Sunday, March 27, 2016

kami ito

Ever since I started studying shifu, I've wanted to cut a Japanese book into strips to make cord.  It's just something I had to get out of my system.  It was a pain.  Lots of trial and error.  First round, the paper was too wet and kept breaking.  Next time, it was too dry.  I finally found a happy medium, but it was still frustrating.  Tree paper gives me uneven cord, and breaks a lot.

Here's the book.  No, I don't know Japanese.  I hope this isn't anything lurid.  


 I don't think it is, because I loved how the cover has this subtle raised background.  See the birds?
Here's a sample of the pages.


a small ball made with 4 pages

 I'm glad that's done.  Time to move on!

Saturday, November 22, 2014

Spinning Paper


 I'll admit it, I like fiber related tools.  My favorite is the Japanese spinning wheel.

It's beautiful, but it's very large, and I can't travel with it.  I also have a Japanese bobbin winder, which is a bit smaller.  
One of my favorite 'spinners' is a western style bobbin winder.  I can put it in a plastic box, and take it to workshops.

 Ever since I started spinning paper, I've wanted to try an Indian charkha.  My friend Aimee and I tried to make box charkhas last year, but I wasn't happy with the final results.  I ended up buying one a few weeks ago.  (ebay)


“The literal translation of the word Charkha or charka is wheel, During Gandhi's time there

was a strong movement to promote self-sufficiency in India. A box spinning wheel was

designed and made compact enough so that every Indian family could own one and spin

cotton yam for their cloth. Gandhi himself contributed to the design of the Charkha by adding an accelerated wheel drive for greater speed. On many occasions he would spin and recommend spinning to others, saying it would bring them peace of mind. Cotton spinning was also meant as a political snub of British colonial rule.” www.shuttleworks.com


The charkha arrived from India.  The packaging was a sewn cotton 'bag.'


If you own a charkha, then you know that the spindle is on the wrong side.  I believe that it was installed incorrectly, because if I have it the other way (facing the left side of the box), the tip almost touches the ground, making it impossible to spin.

This is my first attempt at spinning Thai unryu.  I'll need a lot of practice to get a smooth cord.

If you order a charkha, they do not come with assembly instructions, or info on spinning.  However, there are many good resources on the internet. 

http://www.spinningdaily.com/media/p/59.aspx  Make your own charkha!


   .

Saturday, July 26, 2014

Weaving paper slippers


  As a third generation Japanese American, I am interested in Japanese art and culture.  When I 
saw this photo of a meisen hitoe (repeating patterns on a kimono), I bookmarked it on my computer, knowing that I would return to it sometime for inspiration.                 
               
Several months later, I decided to weave a pair of shoes with the design of the meisen hitoe.  I purchased some Thai unryu paper, which is made from inner mulberry bark.  I am not a calligrapher, nor a painter, so I decorated the paper in my own way.  I painted the circles with sumi ink, using 2 horsehair brushes that I had recently made.
.

                               
After the paper was dry, I sprayed it with a fixative so that the ink wouldn’t run when it got wet. I set aside some of the paper for the soles, and then proceeded to prepare the paper for weaving.  I folded the paper in a “w” shape horizontally, and measured and cut ½” strips so that I could get a long, continuous length.  It gets roughened up in preparation for spinning, and misted with water.   Then I used my bobbin winder to spin it into cord. This is based on a Japanese weaving art called shifu.  Historically, shifu weavers prepare  much smaller strips of mulberry paper, perhaps 2-3 mm wide.  However, I am trying to make a cord that is the size of 4 ply waxed linen.  This is called koyori.
Part of a strip, ready to prepare for spinning


the results
I had purchased pre-spun Habu paper linen yarn for the spokes or warp pieces, and proceeded to cut about 60 lengths at 8”.

I then made a slipper “sandwich” of sorts.  The bottom piece was the torn, decorated paper.  I glued it (white glue) to the bottom of the watercolor paper sole, leaving torn edges extending past the edges. 
In the middle of the sandwich, I glued the warp pieces to the edge of the sole.  One end pointed inwards,  and the long tails (about 7  ½”) radiated around. 
The top of the sandwich was another water paper sole, covered with my decorative paper.  This time, I cut  the decorative paper exactly the same size.
I glued all of the parts together, and let them dry overnight, weighted down between waxed paper.


The next day I proceeded to twine around the sole with my koyori paper yarn. Twining is a basketry technique that uses two moving weavers (or weft)  that are alternately placed in front and in back of a stationary warp cord. I used the plain twining technique, going up to the right, or an S twist.  I immediately started the sides of the shoes.
After 5 rows, I glued the decorative paper from the bottom of the sole so that it would go up over the sides, and cover the bottom two or three rows.  I continued weaving upwards, applying gentle pressure on the front warp cords, so that the vamp would start forming.  In order to make the vamp area ‘grow,’ I had to do short rows in just the front of the slipper, followed by a complete row, all the way around.  Some spokes were cut out of the front since it started to get too tight for the weavers to pass smoothly. 
When the sides were close to one inch tall, I decided to stop weaving with the multi-colored cord, and switched to two black weavers to finish it up.  The last few rows formed a solid black band.

To finish up, I did a two part rim.  The first row around, I took a spoke (warp cord) and had it go in back of its neighbor to the right, and then out, and continued all the way around.  For the second row, I did a row of a basketry rim called Gretchen’s Border.  To do this, 3 spokes are laid in the left hand.  The farthest spoke to the left goes over the two on the right, and then is pushed down.  Then a new spoke on the right is picked up, and you continue all the way around.  I had originally planned to do more rows, but found that paper isn’t the best medium for this border.  After I trimmed the spokes to ¼”, I had some slip out, and they were too short to insert back into the pattern, so I ended up with the rim as it is now, and applying a bit of watered down glue with a paintbrush to keep them from moving.


When I started the right shoe, I did it in the same manner as the other.  However, at the end, in spite of my measuring the left shoe, the right one turned out a bit shorter in the vamp area.  I didn’t realize this until I had already completed the rim and cut the warp ends off.  The finished shoes are each 6 ½” long, 2 ¾” across.